¶ Working with a List of Tasks
¶ Todo list
The user’s personal list of tasks, which is similar to the Allocated list in the Cerebro client module (see the section To Do list), is supposed to be the main tool of the Cerebro Tentaculo user.
When a task is assigned to you, it appears in your To do List. As soon as the task’s status is set to ready to start, you can start working on it.
You can open up this list by clicking Cerebro > To do List in the menu.

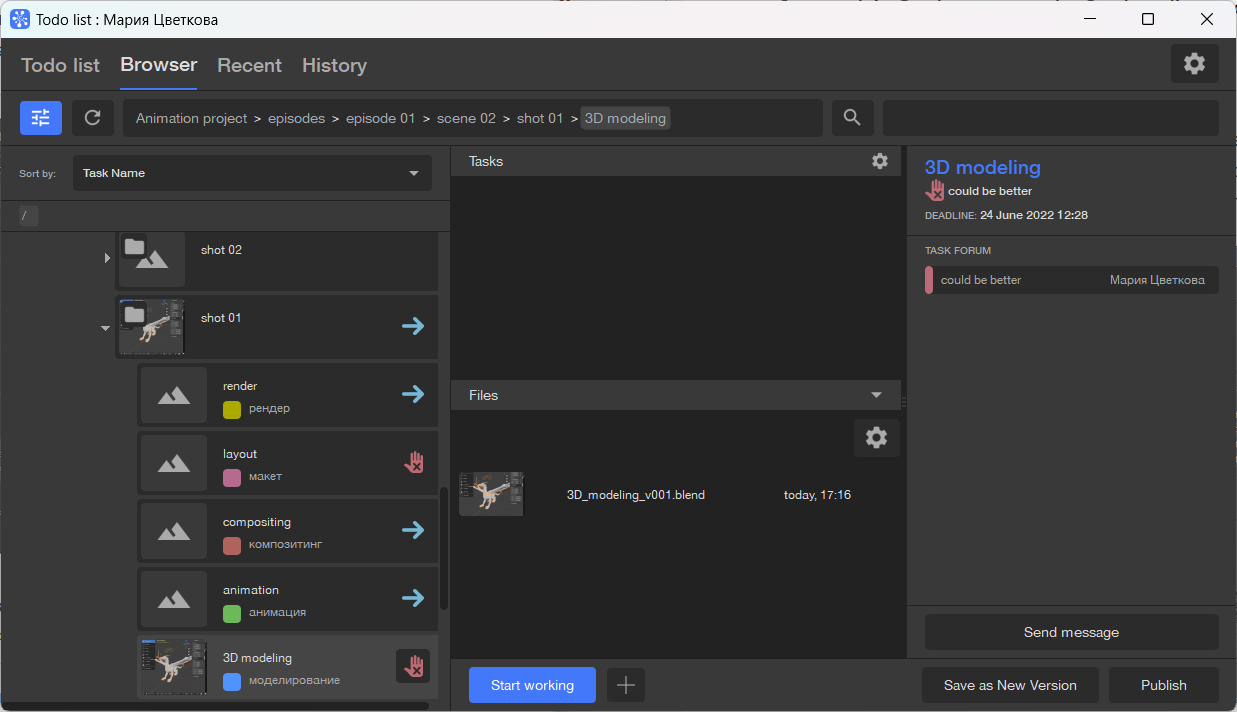
In the pop-up window, on the left side, you will see the list of tasks assigned to the user. Above the list there is a filtering and sorting button. In the drop-down list you can select a sorting mode (by order, task name, status, activity type, deadline, and project) and filter the results by status or activity type.
On the right side, the content of the selected task is displayed. The heading displays general attributes of the task: the name, path inside the project, status, and deadline.
Under the heading you can see the list of versions published in this task sorted by the publication date in the descending order.
The following icons are used to highlight the list items:
-
the main published version of the file (the icon with the Latin letter ‘P’) is the current variant of the file processed in the graphical application; it usually coincides with the latest published version.
-
the local version of the file (the icon with the image of a computer) is the version stored locally on the computer’s hard drive and processed in the graphical application. It has not been published in Cerebro yet and can be displayed only on the workstation where it was created.
Note
In fact, a Cerebro task does not display the full list of files attached to the task. It shows only the list of files filtered by extensions supported by the graphical application running the Cerebro Tentaculo plugin (for example, for Autodesk Maya only files with .ma extension will be displayed).
The quick filter mode of the file list is selected by the button located on the right above it, there are three possible options:
- Show All Versions — display all available file versions in the list;
- Show Recent Versions — display only the most recent versions of a file;
- Hide Versions — do not display versions, only the last published version of the file is available for download.
On the right side of the window, there is the correspondence in the task forum in the form of a text message feed. You can use the Send message button to send a text message to the task forum and attach files to it if necessary.
Note
Access to operations on a task or files may be limited if another executor has already accepted the task; then the lock icon will be displayed in the task’s heading.
You can accept a task by clicking a button under the list of versions.
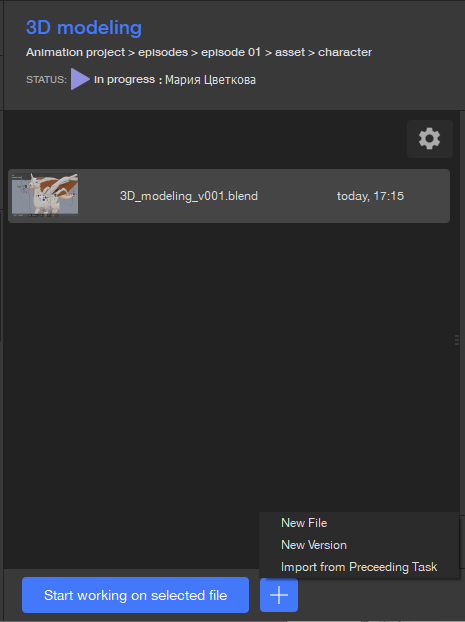
You have the following options:
- If no file is selected in the list of versions, then the button under the list is labelled Start working. Clicking the button will launch an automatic selection of a version which will be loaded into the graphical application. This will be the main version or the local one (depending on the date of creation). If the list of versions is empty, a new file will be created.
- If any file is selected in the list of versions (not necessarily the latest version), then the button under the list is labelled Start working on selected file. Clicking the button will load the selected version into the application for further editing.
- Regardless of availability and selection of versions in the list, you can use commands called by the ‘+’ button under the list:
- New File — create a new file and start working on it;
- New Version — create a new version of the selected file and start working on it;
- Import from Preceding Task — load the version from the task of the previous stage, i.e. find the predecessor task and load the main published version as the source file to work on using Cerebro links (see the section Task Tools).
If you accept the task, its status will be set to in progress, and the report will be published together with the graphical file in the task’s forum in Cerebro. Then you can close the list of tasks window and proceed with working on the file.
Other commands applicable to the list items are available in the context menu, which appears upon the right-click on a file.
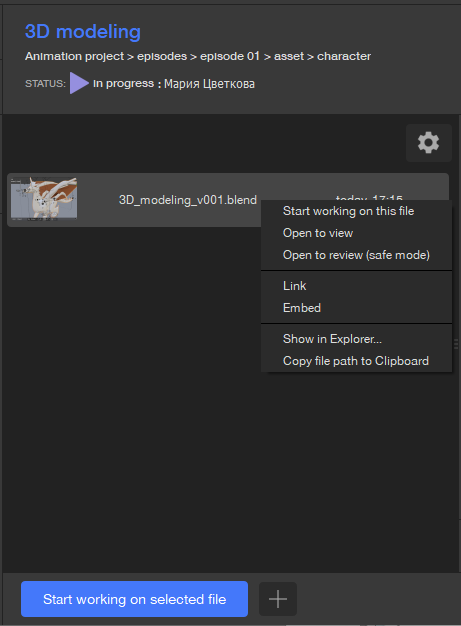
- Start working on this file is used to start working on the selected file, i.e. it is the same action as clicking the Start working on this file button when this file is selected in the list.
- Open to view — the file is only open for viewing.
- Open to review (safe mode) — when a version is opened in safe mode, the file is copied to the .vreview version. Then you can make any changes without any issues with the original version. The postfix name and path for storing such files can be specified in the configuration file.
- Link is used to insert objects from the selected file into the current scene using a link. Changes in the linked file will be displayed in the general scene as well.
- Embed is used to insert objects from the selected file into the current scene. Further changes in this file will not affect the general scene.
- Show in Explorer is used to show the selected file in the folder on the hard drive.
- Copy Local Path to Clipboard is used to copy the local path of the selected file to the clipboard.
Note
The actions similar to the Link and Embed context menu commands can also be performed in the project browser in the Library mode (see the section The browser in the Library mode).
In the bottom right corner of the list of tasks window, there are two buttons: Save as New Version and Publish. Both buttons prepare a report and send the current file version to Cerebro. The only difference is that the first button only adds a new version to the list of files, whereas the second button publishes the file as the main version of the task in addition. For more details on preparing a report, see the section Publishing a report.
Note
After the task is taken up by you, you can use the following commands from the Cerebro section in the main menu:
Open task folder — open a folder in the system browser that contains the file versions related to the current task;
Open task in Cerebro — open the Cerebro client program and go inside it to the forum of the current task.
¶ Project browser
Sometimes you may need to access some parts of a project beyond the list of the assigned tasks, for example, if these parts contain files necessary for your work. For these aims, there is the second tab in the list of tasks window, containing the project browser.
In this window, on the left side, the project tree is displayed, which is similar to the one in the Cerebro navigator (see the section Navigator). Using the tree, you can access any available project/task. Selected tasks and the scope of functions upon a task are displayed in the way similar to the Todo list window, except for the Library mode (see the section The browser in the Library mode).
Note
If you start working on a file from one task, you can publish it in another task after processing. Thus, for example, you can take the result of another executor’s work as the source file for your task.
¶ Search
In the right part of the window, there is a task search field. Tasks can be searched using either links or text.
If you press Enter after entering the text, a global search for tasks in the selected project tree will be initiated, and the results will be displayed in the task list.
Search can also be performed by task paths and http-links to tasks. Pressing Enter will open the task in the tree.
¶ Recent
Tab shows tasks in which files were opened.
¶ History
History of tasks that have been open for more than 3 seconds.