¶ Task Statuses
Status is a task property that defines task’s current state or work process step. Using statuses, you can set up a selection of work process milestones.
At the Task statuses tab of the Cerebro Administrator Panel you can create or edit statuses that are used during the work on your projects, set up their order, status switch permissions and automatic status switching rules.
Task statuses window contains three tabs:
- Statuses;
- Switch permissions;
- Linked tasks rules.
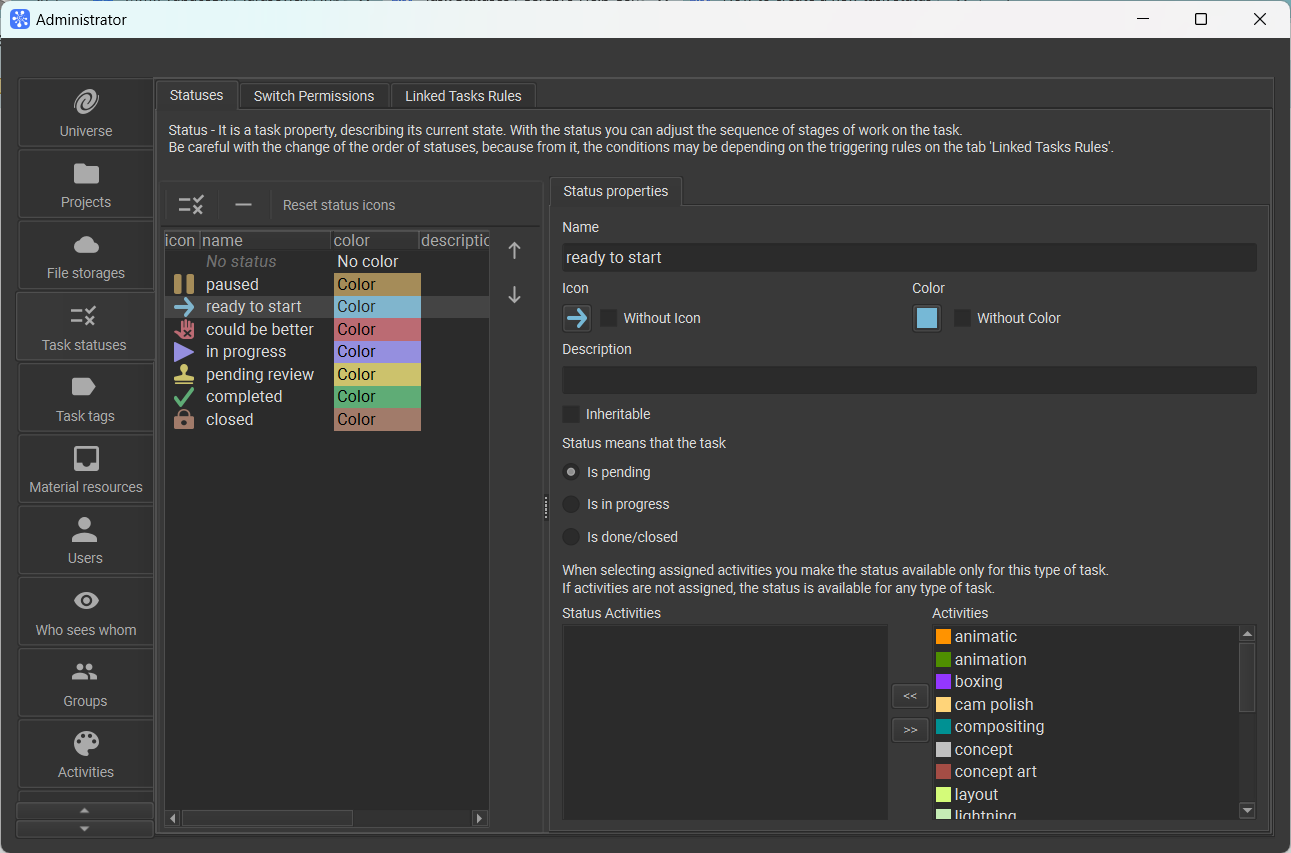
¶ Statuses
On the tab, you can set up status list, their sequence and settings of any given status.
On the left side of the tab is the list of all statuses in your selected universe, and on the right side there’s a list of properties for the selected status.
Using arrows on the right side of status list, you can adjust their order according to your typical work process milestone sequence.
Note
Be careful while editing status order because your custom rules that are set at Linked tasks rules tab might depend on it.
¶ Switch permissions
The tab is used to set up task status change order according to user permissions.
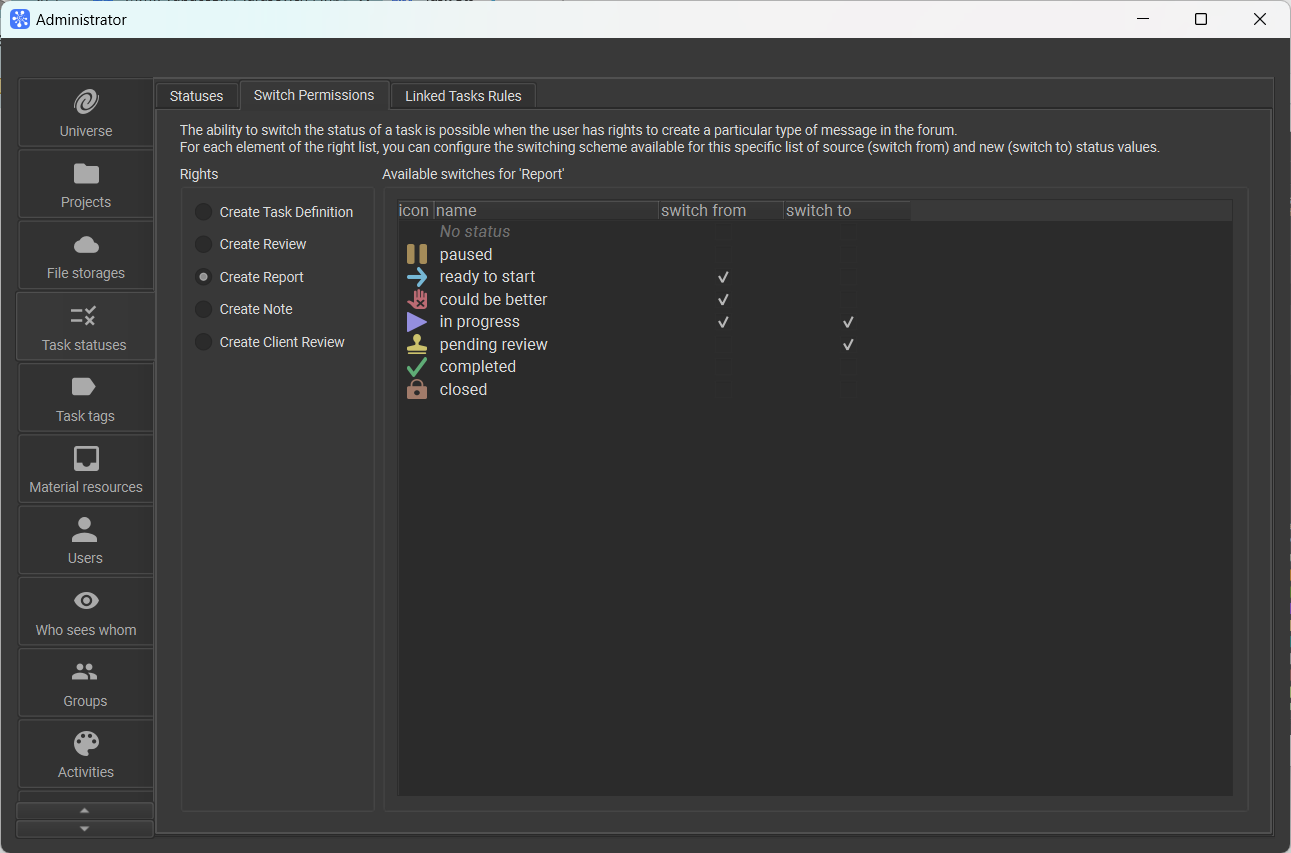
Ability to switch task status is defined by user permissions to create a post of any given type. For every element from the list of permissions, you can set up a custom task status change order. To do that, you should define a list of initial (Switch from) and new (Switch to) status states.
¶ Linked tasks rules
On the tab, you can set up your rules for automatic task status change sequence according to different conditions related to linked tasks.
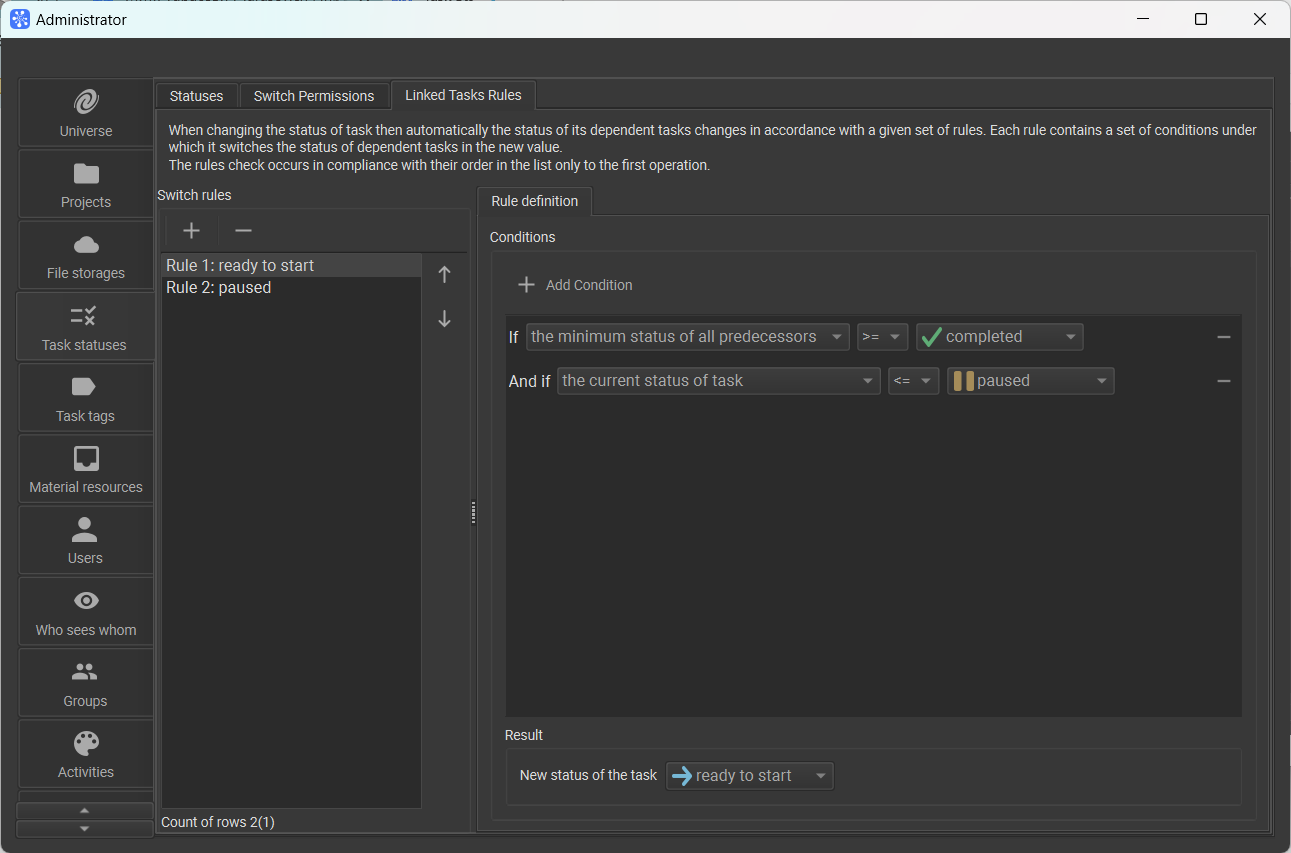
With every status switch in Cerebro, a status check is made for every linked task, and if any given rule triggers, the status is changed automatically.
Every rule has a set of conditions and a new status state that is given to a task if conditions are met. Rule check occurs according to their order in the list, and only the first rule meeting all the conditions is triggered.
By default, there are two rules in Cerebro:
- status switches to ready to start if all predecessors were given complete or closed status;
- status switches to paused if any one of the predecessors enters the state lower than complete.
You can make or adjust rules to meet your needs. To add a new rule, press ‘+’ button just above rules list, and to remove an existing rule, just select it in the list and press ‘-’ button.
You can also change rule sequence using arrow buttons at the right of rules list. Rule name is formed from its order number and status that is assigned when the rule is triggered.
To edit a rule, select it — on the right side of the tab, you will see its properties: a set of conditions and a status assigned to a task when a rule is triggered.
The Add condition button is located above conditions list, and it allows you to add another condition, while ‘-’ button to the right side of any condition removes it. Conditions are linked by logical ‘AND’ operator, this means that the rule will trigger only if all the conditions are satisfied.
Every condition on the list is a rule that compares status of an existing task (or a set of tasks) and a given status state. Using three drop-down lists, you can assign:
- a set of tasks that are checked for the status;
- comparison operation, ‘<’ and ‘>’ symbols refer to a position in general status list;
- status state that is compared with it.
On the bottom of the tab, there’s a drop-down list which is used to set up a status that would be given to a task when the rule triggers.