¶ Tasks Import from Tables
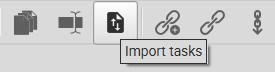
In Cerebro you can import tasks from a table using the button in the Task Tools or via the context menu.
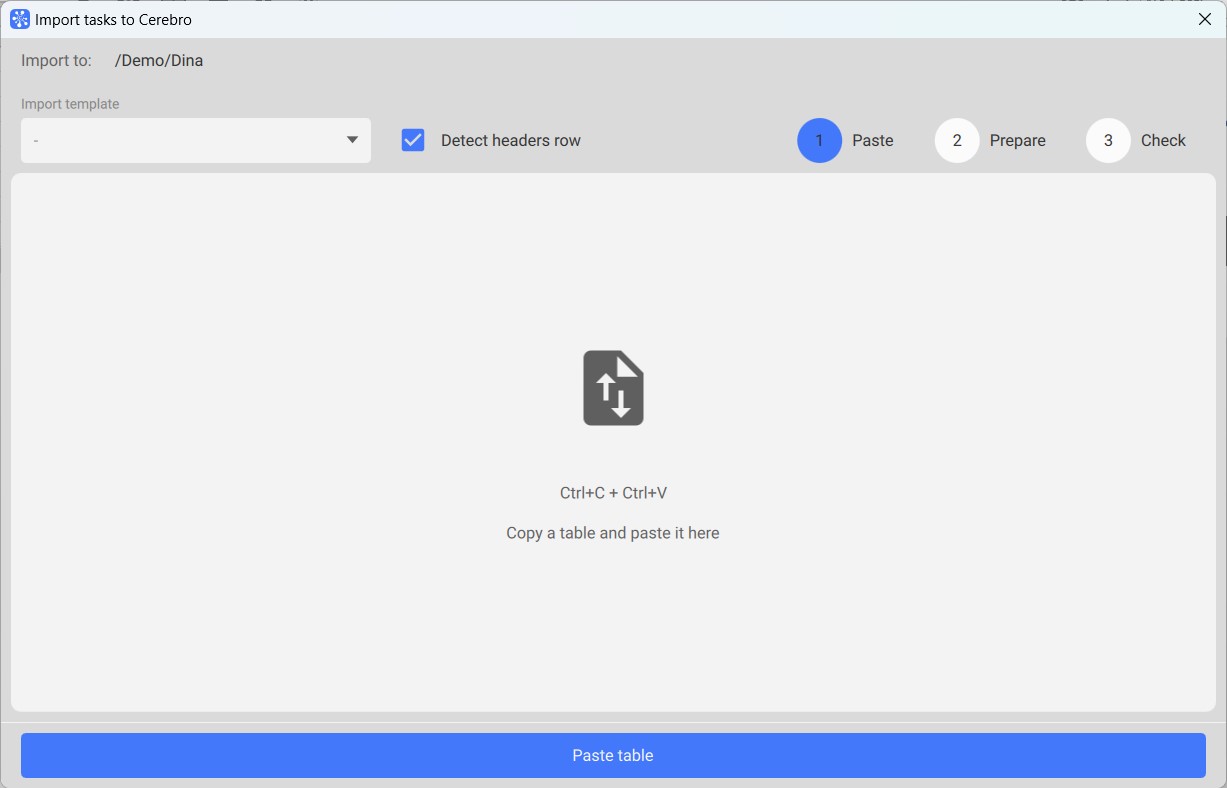
Select the location to insert imported tasks in Navigator and click the Import tasks button, this will open a window for importing tasks from a table into Cerebro. Select the table in your file and paste it into this window using the Ctrl+C and Ctrl+V hotkeys.
¶ Import tasks of the same level
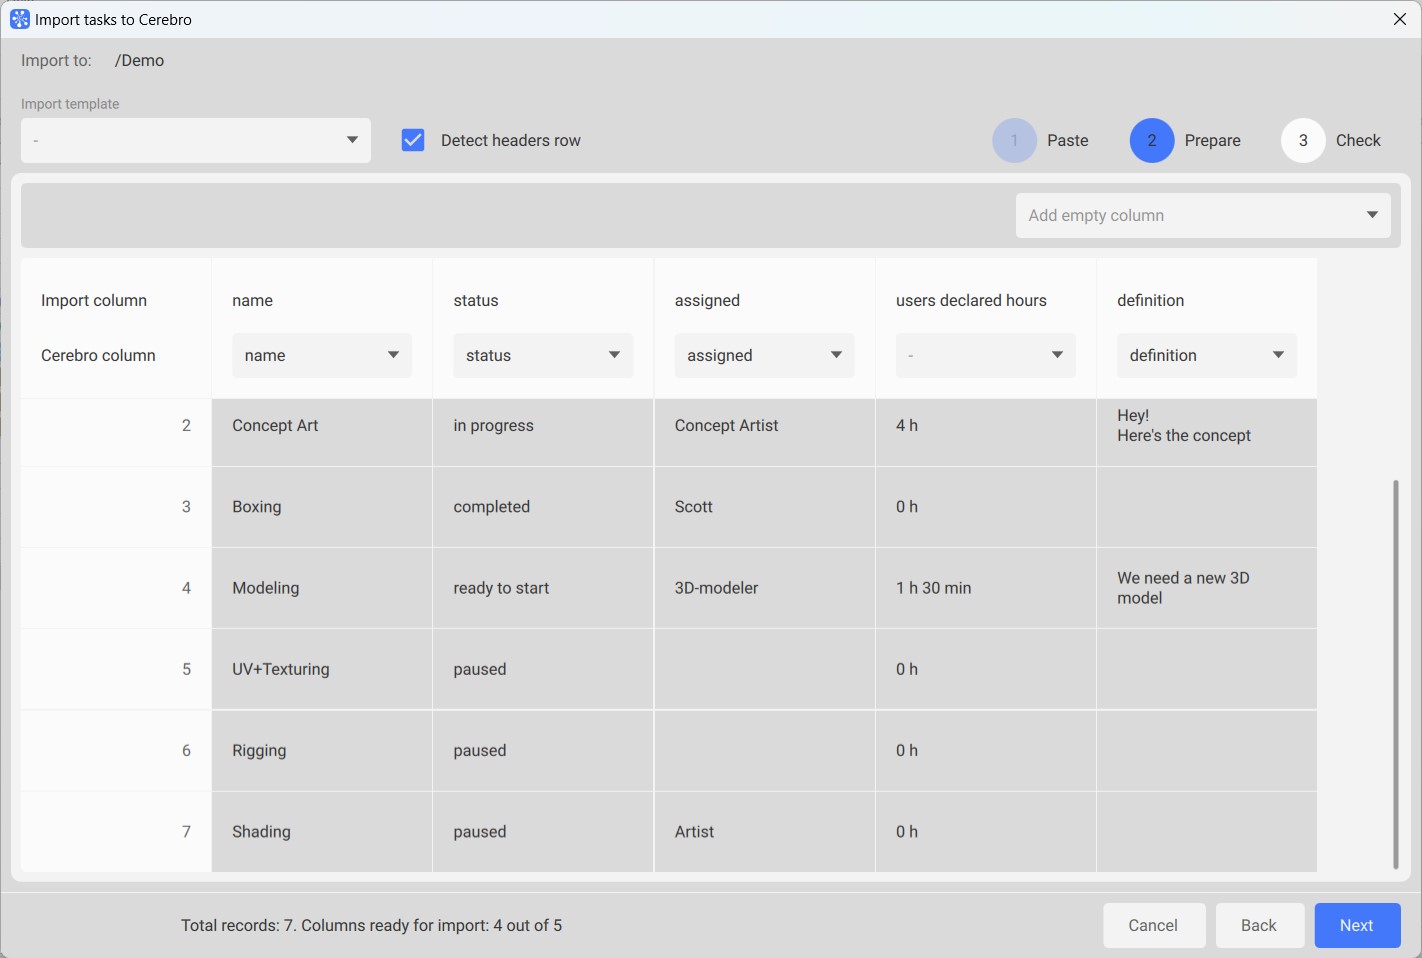
When the data from the table is inserted, you need to match the Cerebro property and the column of the table. In other words, you need to specify which column stores task names, which column stores their statuses, and which column stores other properties. You can also add empty columns to fill in these properties later.
Pay attention to the line at the bottom of the window. It shows how many tasks and columns will be imported. This number is preliminary and can be reduced in the next step.
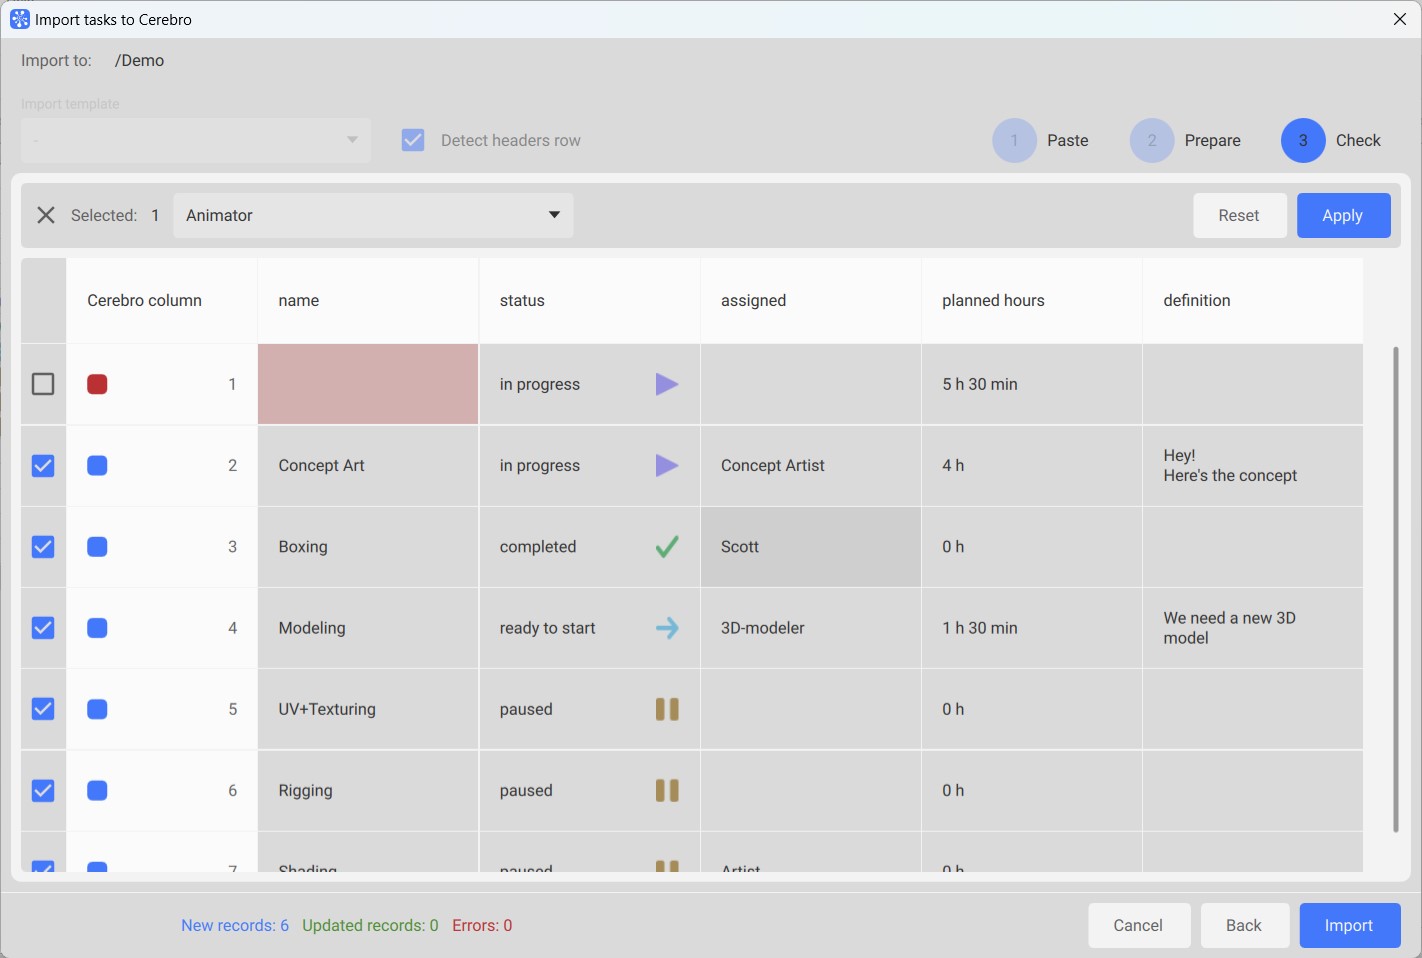
In the third step, you can check and edit the data you're importing.
To edit a cell, select it, change its contents in the field above the table and click Apply button in the top right corner. To upload files to attachment columns, just select a cell, drag and drop the file into the import window. The example above shows that errors in cells are highlighted in red. You can exclude such lines from import using the checkboxes on the left or edit the cell to get rid of the error.
Pay attention to the line at the bottom of the window.
- New records — the number of tasks that will be added to the Navigator list.
- Updated records — if there are already tasks with the same names in the selected import path, they will not be added to the list. Instead, the system will modify the existing tasks.
- Errors — tasks that cannot be imported (for example, without a name) are highlighted in red.
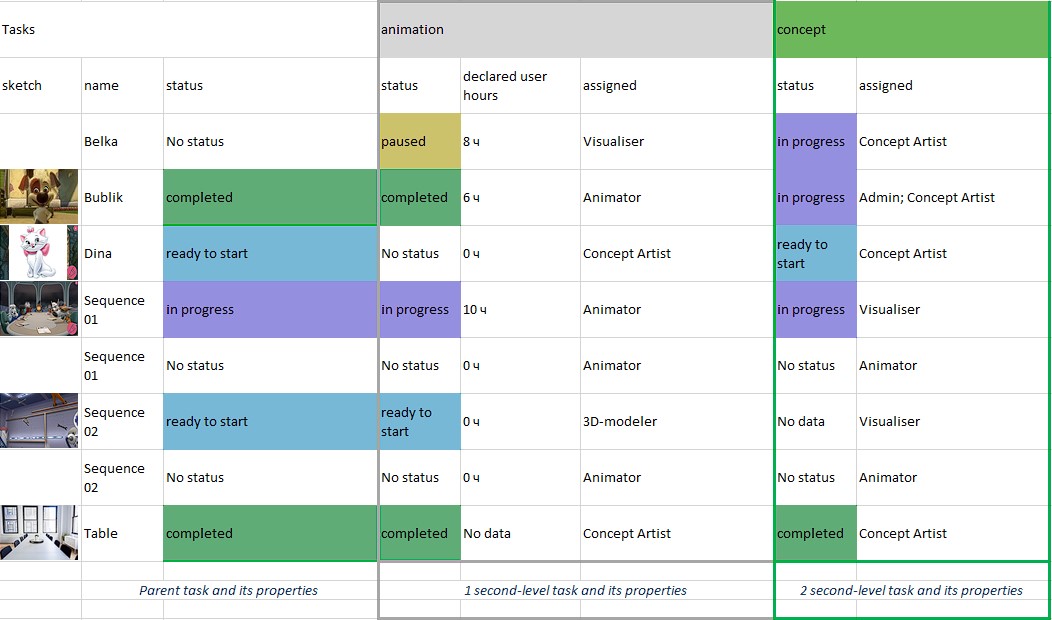
¶ Importing tasks with subtasks
The screenshot below shows an example of tasks with subtasks.
The import result will be as follows:
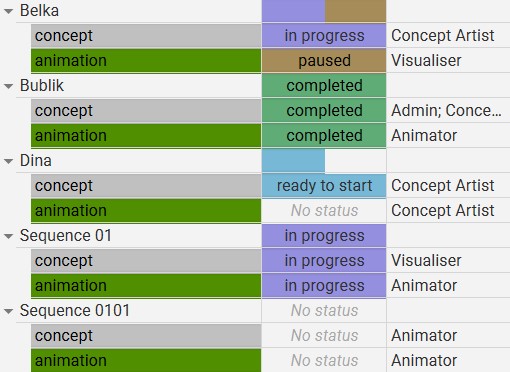
Each parent task creates two child tasks with the specified properties.
There are standard templates for importing tasks and custom ones. You can select the appropriate one in the top left corner of the import window. For example, we will use the standard template for importing subtasks by type of activity.
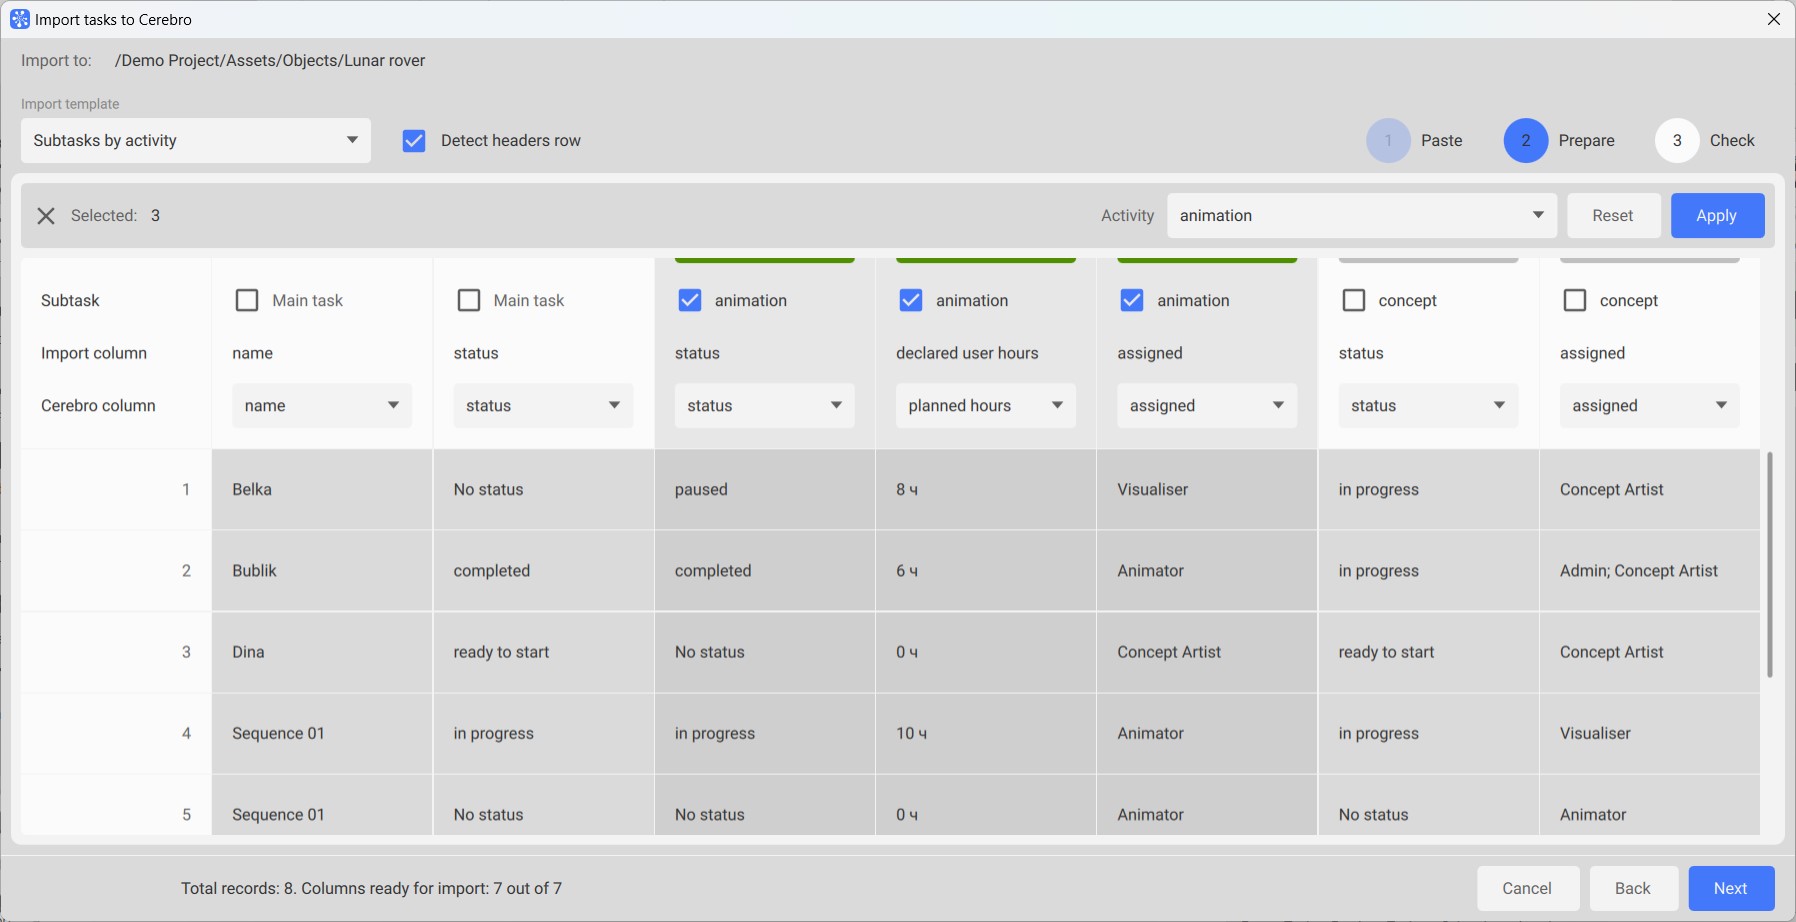
At this stage, in addition to matching the Cerebro property and the column from the inserted table, you should select all the columns of each individual subtask and specify its type of activity. We do not change the activity type of the parent task.
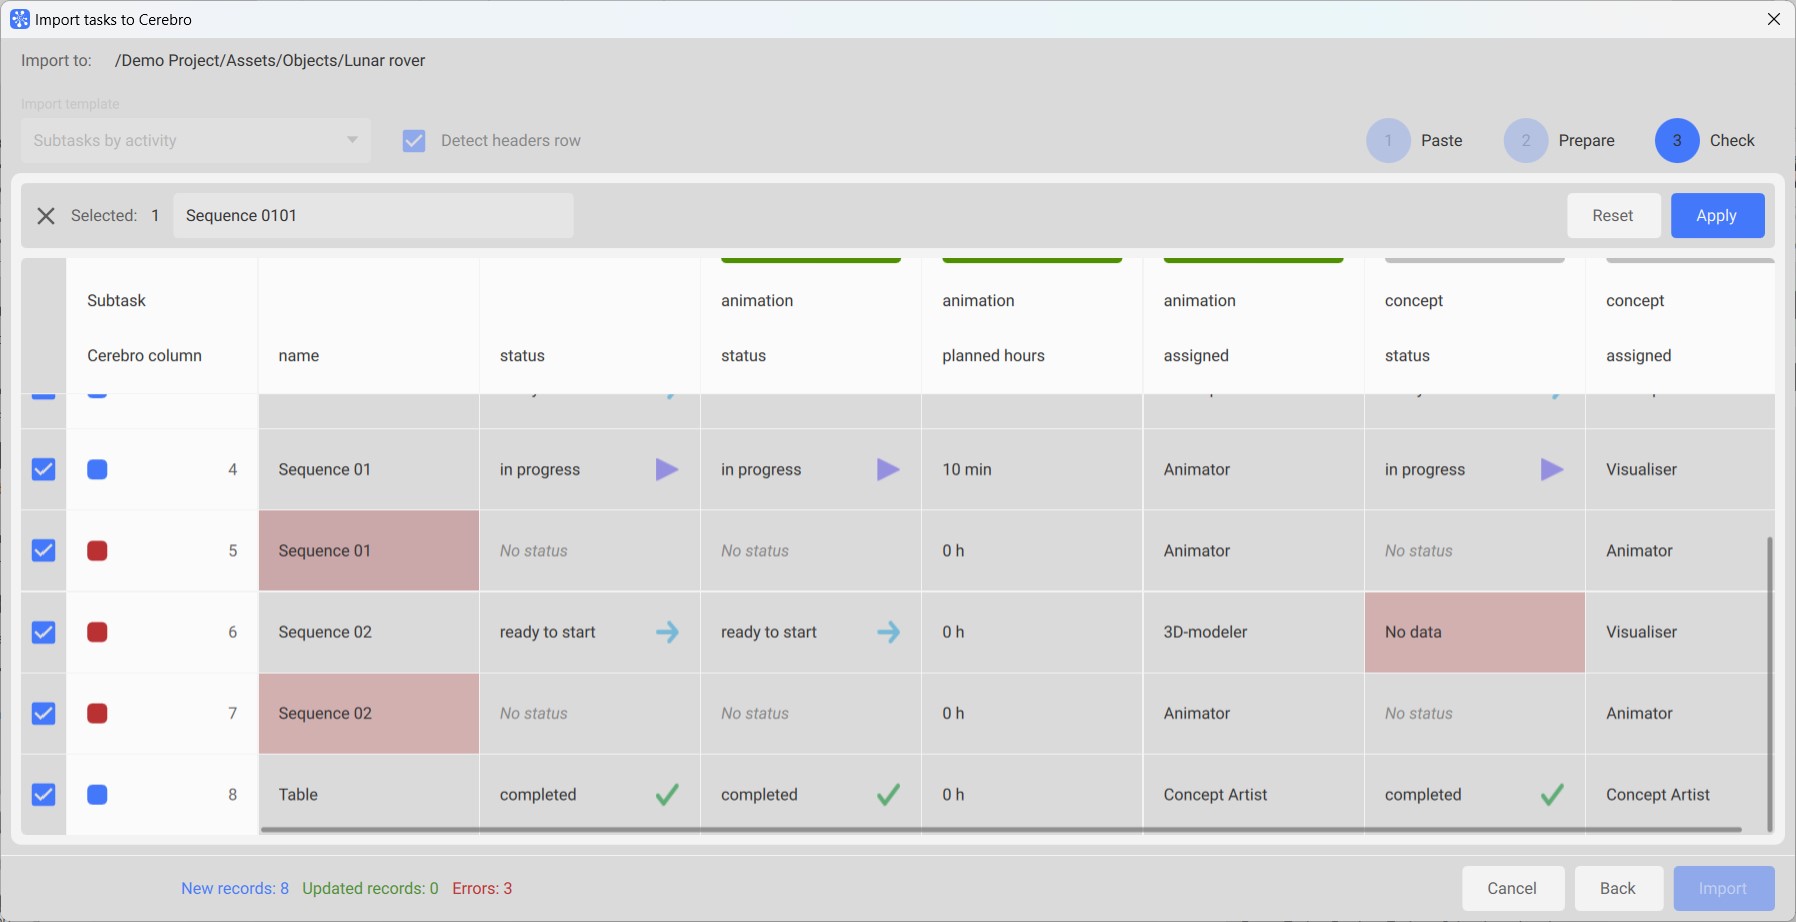
At the third stage, you need to check and edit the imported data. In this example, we see several errors:
- You cannot create tasks with the same names - select the cell, edit the name in the field above the table and click the Apply button.
- There is no status with the value "No data" in the system - select the cell, then choose a status from the existing list.