¶ Creating and Using a Task Template
Creating tasks from templates greatly simplifies the process of generating tasks and reduces the time required for it.
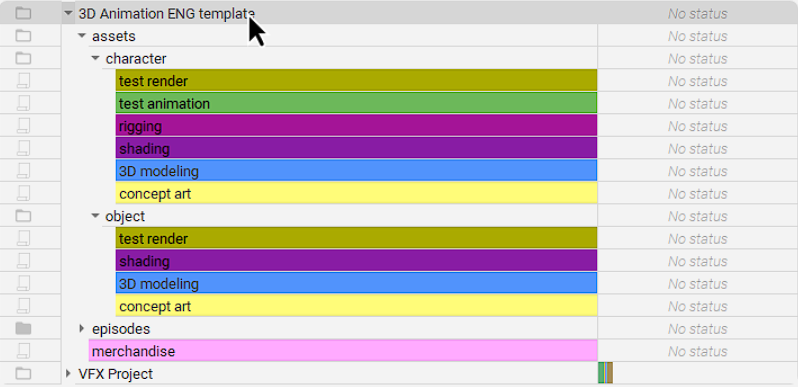
A template is a reference file which is used to create a task, i.e., the settings of the selected template will be used when adding a new task. A previously created task is used as a template — it can be either a single task or a branch of tasks with subtasks.
¶ Creating a Task Template
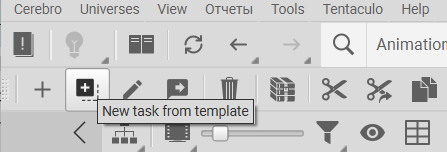
To add a new task template, go to Navigator, select the project you want to create a new template in and click New Task From Template in the toolbar at the top of the main window.
Expand the Name drop-down list and click Add New Template or click the + button to the right.
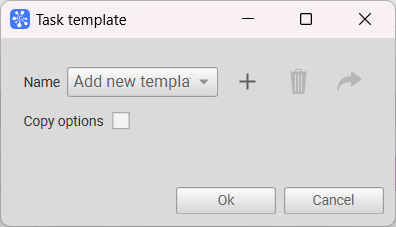
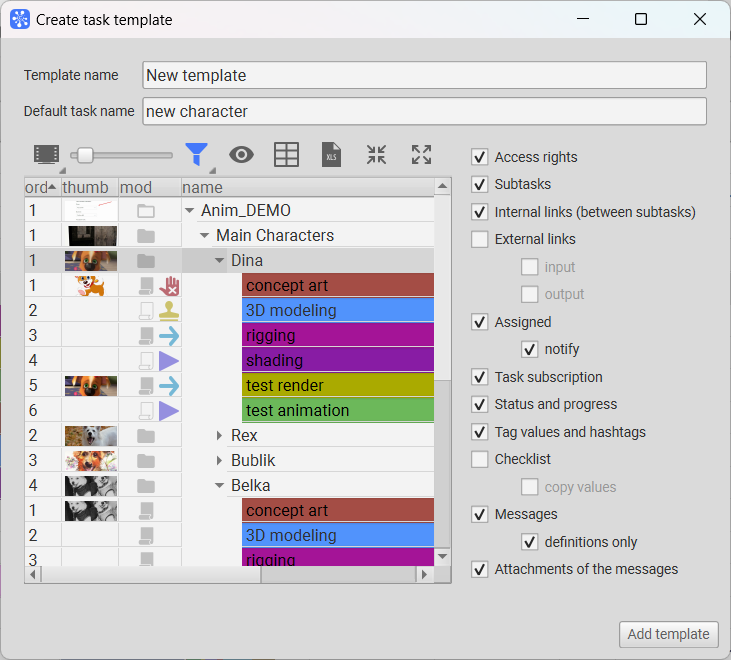
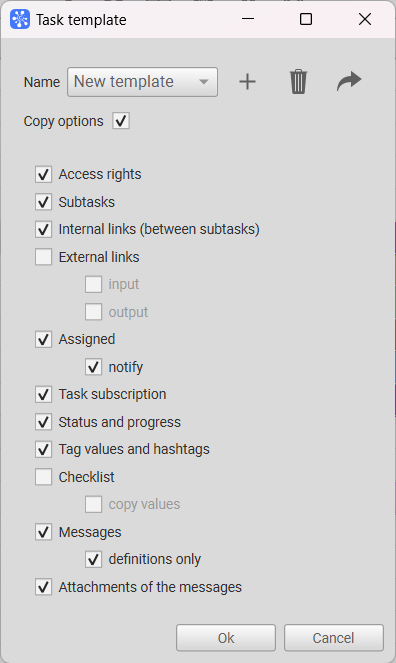
When the dialog box appears, enter the template name and the default task name.
In the task tree in the left part of the window, select the task (or a task branch) for the template. In the right part of the window, select the settings that need to be replicated from the template task:
- Access rights are rights needed to access tasks by different types of users;
- Subtasks are tasks included in the main task of the template;
- Internal links are links of subtasks within the main task;
- External links are links of the main task with other tasks of the project;
- Assigned are those who were assigned to work on the task;
- Task Subscription are users who subscribed for notifications about changes in the task;
- Status and Progress are statuses that show the progress of the task;
- Tag values are fields that contain additional information;
- Checklists are lists of things that need to be completed;
- Messages are the task forum; you can select the Definitions Only option (only tasks will be replicated to the template);
- Attachments of messages are files attached to messages in the task forum.
The replicated settings apply to all subtasks in the template. Then click Add Template.
Note:
For ease of use and editing, we recommend that you create a separate project or a project branch where task templates will be stored. This will allow you to keep all the templates you use in one place. It will also make it easier to find them for editing and will eliminate the possibility of accidental deletion.
¶ Creating a Task from a Template
To create a task from a template, select the project you want to create a template task in, then click New Task From Template. Expand the Name drop-down list and select the name of the desired template. If needed, click the Copy Options button, this will allow you to specify the properties that will be replicated from the template. By default, the copy options are identical to those set when the template was created.
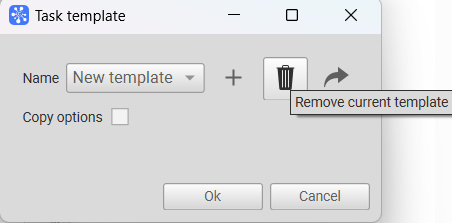
¶ Deleting a Task Template
To delete a template, select it in the Name drop-down list and click Remove Current Template.