¶ Wiki
Wiki in Cerebro is a universal tool for organizing knowledge. With its help, you can create instructions tailored to the specifics of your workflow and apply them to efficiently solve tasks.

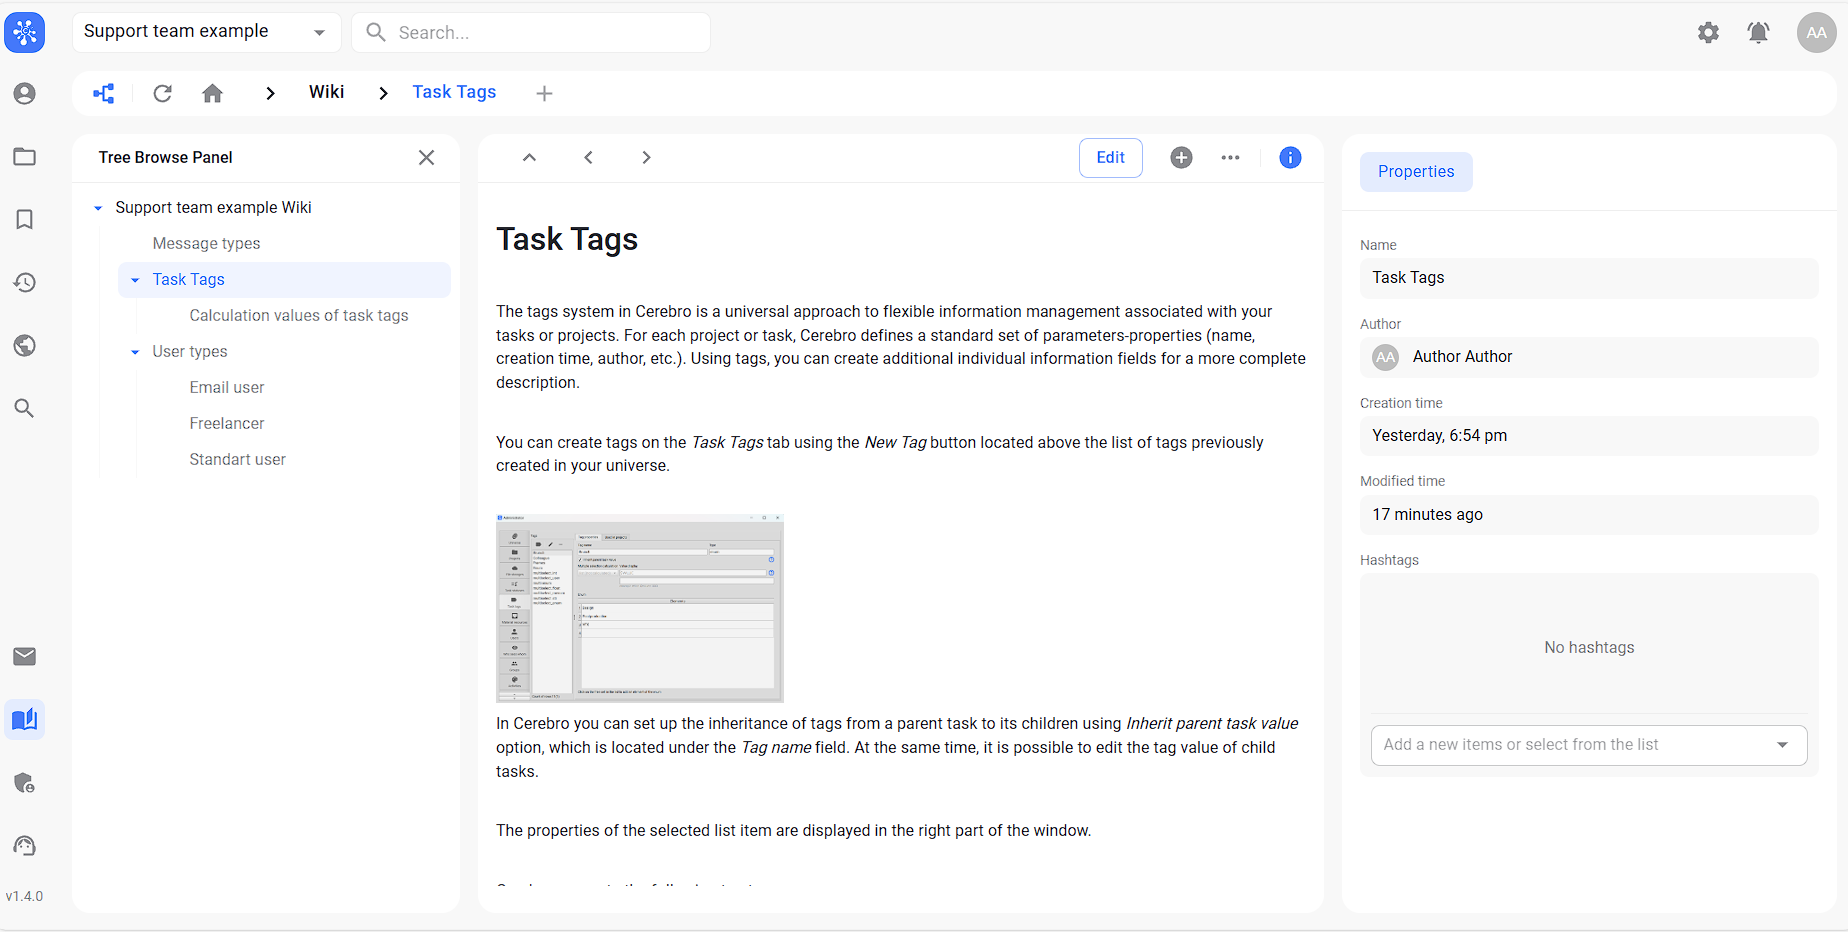
All users of the universe can open the Wiki through the left panel in desktop and web version of Cerebro.
To create your own knowledge base, you need to either start a new project or rename an existing one, assigning it the name wiki so that the project appears in the relevant section. The project itself will not be hidden from the general list for now.
To create an article or sub-article, use the Add Article button located above the main article text. When creating a new article or editing an existing one, an editing window opens. At the bottom of the screen, standard text formatting elements appear, including font selection, creating quotes, headers, lists, adding horizontal lines, code, links, images, and user mentions.

Additionally, using the Article menu button, you can Move or Delete the created one.
The right part of the window displays the article structure for easier navigation.
On the left there is Article properties panel. The panel contains its name, author, hashtags, creation and modification time. Hashtags can be used to facilitate searching through articles, which can be done using the search bar located at the top of the page. The visibility of article properties can be easily managed with the Hide/Show article properties panel button.