¶ Working Schedule
The job scheduling system allows you to set the work schedule for the users of your universe. There can be several schedules for different groups of users. This way you can transit your workflow into Cerebro.
Scheduling window can be accessed by clicking Tools > Working schedules… in Cerebro main menu.
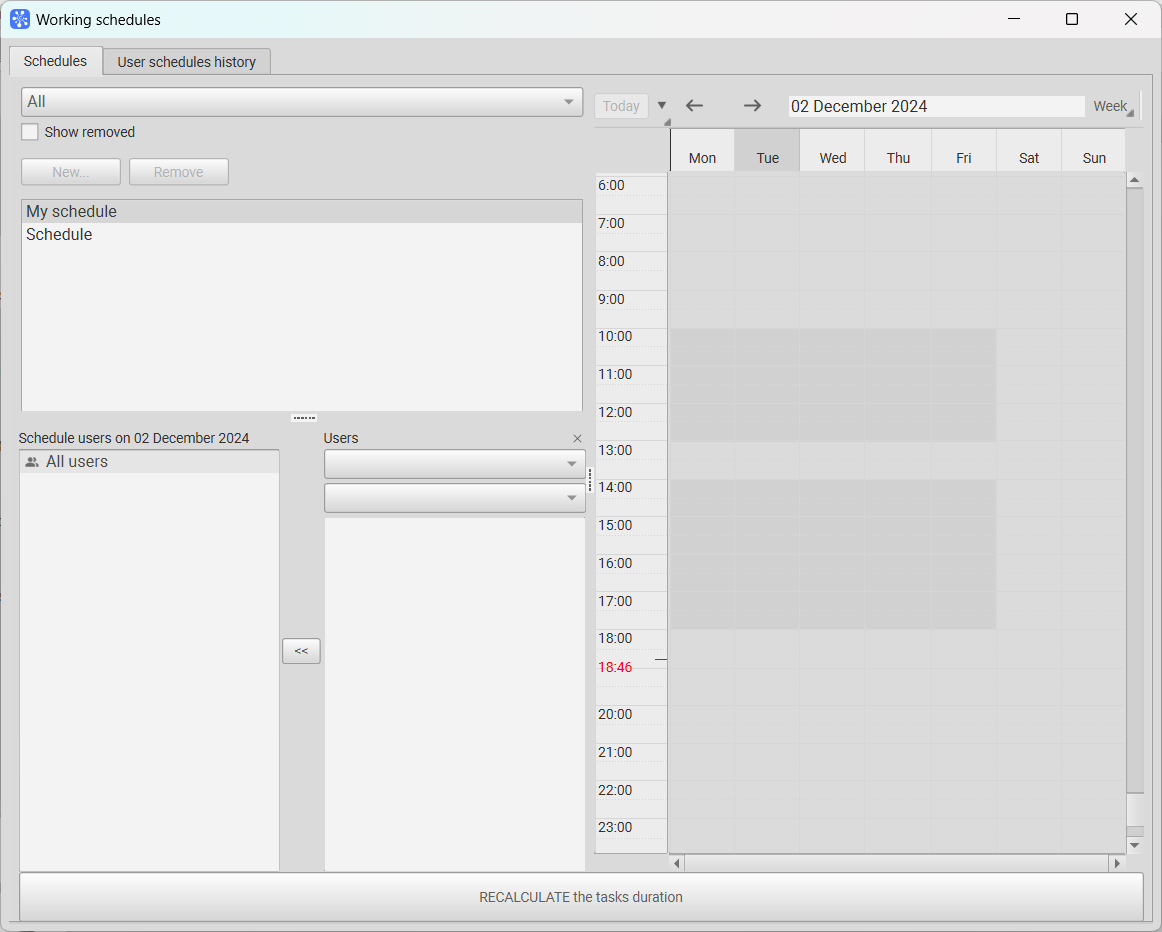
When you create a new universe, there is no default timetable. This means that all users are working on a 24 hours a day 7 days a week schedule. You can create a new schedule by clicking on the New… button.
On the right of the Working schedule window there is an area in which current working schedule is displayed as a graph.
Editing the schedule consists of two phases:
- Selecting the date on which the changes will take effect;
- Adding a graph to the drawing area. The working schedule is applied by clicking and dragging left mouse button and erased by right mouse button.
To increase/decrease the horizontal zoom use the mouse wheel while holding the Shift button. Similarly, while holding the Ctrl key, you can change the vertical zoom of the drawing area.
Once you have created a work schedule, one or more users should be assigned to it. At the bottom left is a panel for assigning users to schedules.
Note
Be careful, users are assigned to the schedule from a certain date, which is selected in the top panel. Time parameters of tasks assigned to user will be calculated based on its work schedule.
For all Cerebro users that aren’t explicitly assigned to a certain timetable, there’s Generic “<Universe name>” user category. This way you can create a schedule for all “users” that aren’t assigned to a specified timetable.
Note
It is important to understand that the schedule starts to work from a certain date, and at some point in the future it can be changed by a new schedule, but all the tasks planned before changing schedules will have their parameters unchanged.
An important detail is that the timetable is set for user’s local time. This means that people in different time zones will see the schedule in their local time. For example, 9:00 to 18:00 schedule in Moscow time will be displayed as 16:00 to 1:00 schedule in Vladivostok.
As already noted, when schedules change, timing characteristics for certain tasks might need to change too. To update them you need to recalculate task parameters (otherwise it can be done through editing tasks).
To start the conversion, click the RECALCULATE task durations button in the timetable window.
So, to work with schedules you need to pay attention on following things:
- you should create a timetable:
- assign users to it (including Generic user);
- pay attention to dates;
- don’t forget that assignments start from a pre-defined date too.
Schedules will be displayed in Gantt chart and Сalendar.